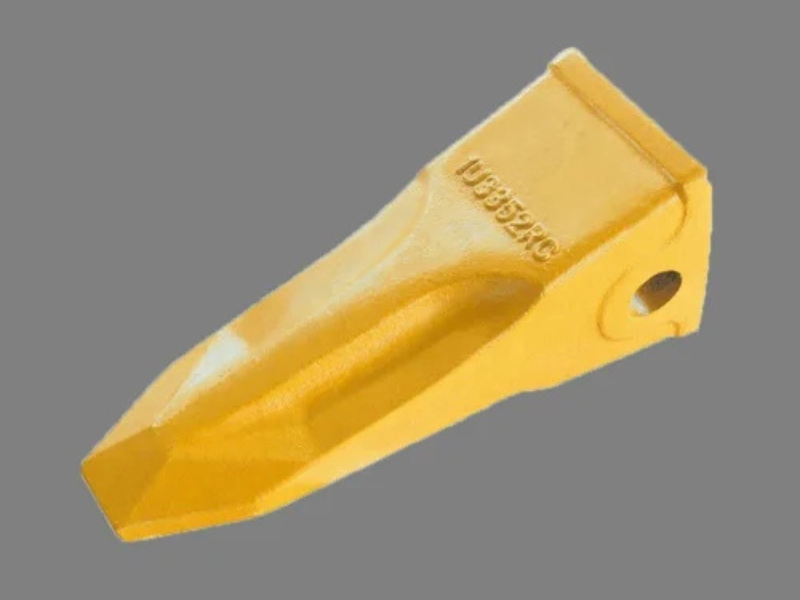
When it comes to maintaining agricultural implements like rotavators, cultivators, or tillers, one of the most important components to check regularly is the tooth points. These small yet crucial parts play a big role in breaking, turning, and preparing the soil for cultivation. Over time, tooth points wear down due to friction with rocks, soil, and other hard particles, reducing efficiency and putting more strain on your machine.
Fortunately, replacing worn-out tooth points is a simple maintenance task that farmers and operators can do themselves with basic tools. In this tutorial, we’ll walk you through the step-by-step tooth point replacement process, ensuring your equipment stays sharp, effective, and long-lasting.
Before diving into the tutorial, let’s understand why tooth points should be replaced regularly:
Better soil penetration: Worn tooth points lose their sharpness, making soil preparation less effective.
Increased efficiency: Sharp tooth points reduce the machine’s workload, saving fuel and time.
Prevention of damage: Using blunt or damaged points can strain the shanks and other machine parts.
Improved crop yield: Proper soil aeration and mixing with new tooth points help seeds grow better.
To replace tooth points, you don’t need advanced equipment. Here’s what you should keep handy:
A set of spanners or wrenches
Hammer (if necessary)
New set of tooth points
Bolts, nuts, and washers (preferably new for a secure fit)
Safety gloves and goggles
First, park the tractor or machine on level ground and switch it off completely. Ensure the parking brake is applied to avoid accidental movement. Safety should always be your first priority.
Check the condition of the current tooth points. Look for cracks, bends, or excessive wear. If they are blunt or uneven, it’s time for replacement.
Using the appropriate spanner or wrench, carefully loosen the bolts that hold the tooth point in place. Sometimes bolts may be rusted due to constant exposure to soil and moisture. If that’s the case, apply a little penetrating oil and tap gently with a hammer to loosen them.
Once the bolts are loosened, remove the old tooth point by pulling it off the shank. Be cautious, as old parts may have sharp edges or be stuck tightly.
Before installing the new tooth point, clean the mounting surface thoroughly. Dirt, rust, or debris can prevent proper fitting. Use a brush or a clean cloth for this step.
Position the new tooth points on the shank, aligning the bolt holes correctly. Ensure the point faces downward and forward (the correct digging direction).
Insert new or cleaned bolts, nuts, and washers into place. Tighten them evenly to ensure the tooth point sits firmly without any movement. Avoid over-tightening, as this could damage the bolts or the tooth point itself.
Make sure all tooth points are aligned uniformly across the machine. Misalignment can cause uneven soil preparation and strain the rotavator or cultivator.
Once all replacements are complete, start the machine slowly and test it on a small patch of soil. Listen for unusual noises and check that the tooth points are digging smoothly and evenly.
Always clean soil and debris after use.
Store equipment in a dry place to prevent rust.
Check bolts and nuts regularly for tightness.
Avoid using the machine on rocky or extremely hard soil whenever possible.
Replace tooth points in sets for uniform performance.
Replacing tooth points is not only a simple maintenance routine but also an investment in your farm’s productivity. By following this step-by-step tutorial, you can ensure your equipment remains in top shape, reducing downtime and increasing efficiency during cultivation. Remember, sharp and well-maintained tooth points mean better soil preparation, healthier crops, and improved yield.
With just a few basic tools and a little time, you can easily handle this task yourself and keep your agricultural machinery performing at its best.
TEAM. All Rights Reserved. Developed by Pixel Tech.