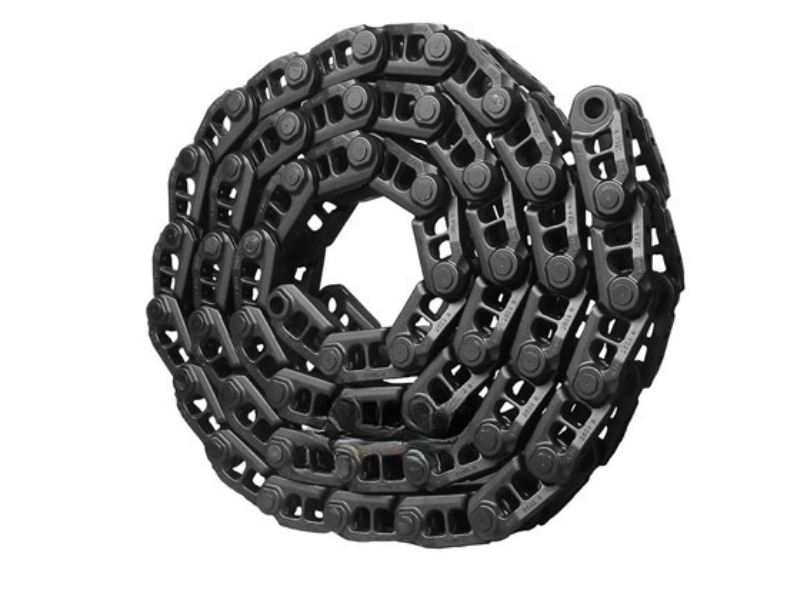
When it comes to heavy machinery like excavators, bulldozers, and other tracked equipment, the Track Link Assembly is one of the most critical components for reliable operation. A well-maintained track link assembly ensures optimal traction, even wear, and extended service life, while a neglected one can lead to costly downtime and expensive repairs.
Performing a DIY pre-job inspection for your track link assembly before starting work can save both time and money. You don’t need to be a certified mechanic — just a basic understanding of what to look for and a careful approach will do the job. In this guide, we’ll walk through the step-by-step process.
Heavy equipment operates in tough environments: mud, gravel, rock, and extreme weather. The track link assembly bears the brunt of this stress, transferring the engine’s power to the ground. Any overlooked wear, cracks, or alignment issues can escalate quickly into a major failure.
Benefits of a pre-job inspection include:
Early detection of wear or damage.
Prevention of unexpected breakdowns.
Improved machine efficiency.
Extended lifespan of the track link assembly.
Before you begin, gather the following tools:
Heavy-duty gloves and safety goggles.
A flashlight or portable work light.
Measuring calipers or tape measure.
Grease gun (for quick lubrication if needed).
Wire brush (to remove dirt for better inspection visibility).
Start with a simple visual scan of the track link assembly on both sides of the machine. Look for:
Cracks in the links or bushings.
Missing or loose bolts.
Bent or distorted track shoes.
A flashlight will help you spot fine cracks or structural weaknesses.
Track tension directly affects wear patterns. If it’s too tight, it can cause premature bushing and pin wear. Too loose, and the track may derail.
Refer to your manufacturer’s manual for the recommended slack measurement.
Use your tape measure to check sag at the midpoint between the front idler and rear sprocket.
The pins and bushings are central to the performance of your track link assembly. Over time, they wear down, causing the pitch (distance between pins) to elongate.
Look for uneven wear or shiny spots indicating excessive friction.
Rotate the track slowly to check each pin and bushing for cracks or deformation.
Sprocket teeth mesh with the track links and can wear into a “shark fin” shape when neglected.
Check for pointed, chipped, or broken teeth.
Ensure the sprocket is aligned with the track link assembly to prevent uneven wear.
Consistent wear across all links is normal, but uneven wear suggests alignment or tension issues.
If the outer edges of the links are more worn, the track alignment may be off.
Excessive wear in one section could mean a seized pin or damaged bushing.
Some track link assemblies are sealed and lubricated for life, while others require regular greasing.
If yours is the latter, check for dry spots or leakage.
Use the grease gun to top up any low lubrication points immediately.
Dirt, stones, and debris trapped in the assembly can cause unnecessary friction and wear.
Use a wire brush or compressed air to remove buildup.
Pay attention to the inner side of the links, where buildup is often hidden.
During your inspection, these issues should raise immediate concern:
Severe cracks in the link plates or bushings.
Elongated pin holes or excessive pitch extension.
Leaking seals in sealed track link assemblies.
Unusual noises when rotating the track.
If you find any of these problems, address them before starting your job to avoid equipment failure.
Operate on level ground whenever possible to reduce side wear.
Avoid unnecessary spinning of the tracks, which accelerates wear.
Store equipment in a dry, covered area to prevent rust.
Perform regular inspections — daily checks during high-use periods are ideal.
A Track Link Assembly is a heavy-duty component designed to withstand intense working conditions, but it’s not invincible. A simple DIY pre-job inspection can make the difference between smooth operations and costly downtime. By developing a habit of checking for damage, measuring track tension, and keeping components clean and lubricated, you’ll maximize the lifespan of your equipment and keep your projects running on schedule.