When it comes to heavy-duty machinery like excavators, the idler plays a crucial role in maintaining optimal track tension and ensuring smooth operation. Whether you’re a seasoned equipment technician or a hands-on contractor, knowing how to perform a field replacement of an excavator idler can save you both time and money. This guide will walk you through the essential steps, safety precautions, and expert tips for replacing an excavator idler in the field.
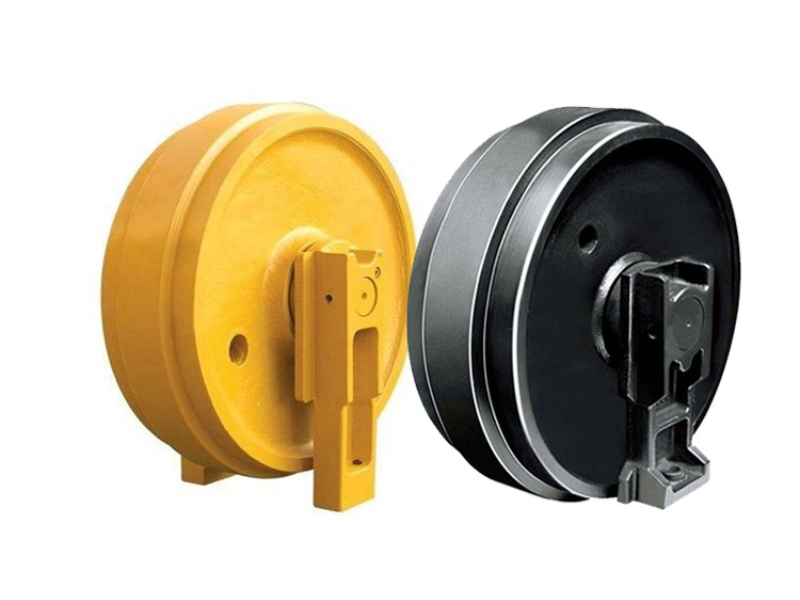
An excavator idler is a key component of the undercarriage system. It helps guide the track and provides tension, allowing the excavator to move smoothly and efficiently over various terrains. Idlers are located at the front of the track system and work in tandem with the track adjuster and recoil spring. When they wear out, they can cause uneven track tension, reduced performance, and even premature wear on other undercarriage parts.
Replacing an excavator idler isn’t just about preventative maintenance — it’s often a necessity after prolonged usage. Here are common signs your idler might need replacement:
Visible cracks or deformation on the idler surface
Excessive wear on the tread or guide
Idler wheel is misaligned or wobbling
Increased track tension issues or track derailing
Abnormal noise or vibration during movement
Ignoring these symptoms can lead to more serious damage and higher repair costs down the line.
Before starting the field replacement, gather the following tools and equipment:
Hydraulic jack or lifting equipment (rated for the machine’s weight)
Heavy-duty wrenches and socket set
Pry bars
Grease gun
Replacement excavator idler
Safety gear (gloves, helmet, safety boots, goggles)
Service manual for your specific excavator model
Before any repair work, park the excavator on a flat, stable surface. Engage the safety lock and switch off the engine. Use wheel chocks or blocks if necessary to prevent any movement.
Use a hydraulic jack or lifting equipment to raise the track assembly. Ensure the machine is stable and securely supported. Never place yourself under unsupported equipment.
To remove the excavator idler, you need to release the track tension. Use the grease relief valve to let out the grease from the tension cylinder. This will loosen the track, making it easier to remove.
Carefully disengage the track from the idler. This step may require a pry bar or additional help depending on the size of the machine. Always take your time to avoid damaging the track links or guide rails.
Unbolt and remove the worn excavator idler from its mount. Inspect the mounting brackets, adjuster, and surrounding components for any signs of wear or damage. Clean the area thoroughly before installing the new idler.
Position the new excavator idler in place and bolt it securely. Refer to the manufacturer’s torque specifications for proper tightening. Check for correct alignment and rotation.
Reposition the track back over the new idler and other rollers. This might be the trickiest part, especially for larger machines. Adjust as needed to make sure everything fits smoothly.
Using a grease gun, refill the tensioning cylinder to restore proper track tension. Follow the specific tensioning guide in your equipment manual to ensure optimal performance.
Lower the excavator and double-check the idler’s positioning, bolts, and track tension. Conduct a short test drive to ensure everything is functioning properly and no abnormal noises or vibrations occur.
Always use OEM or high-quality aftermarket excavator idler parts
Regularly inspect undercarriage components for wear and tear
Clean mud, debris, and rocks from the undercarriage after heavy use
Maintain proper track tension to reduce strain on the idler
Replacing an excavator idler in the field may sound daunting, but with the right tools, preparation, and a systematic approach, it can be done efficiently and safely. Timely replacement not only prolongs the life of your undercarriage but also boosts overall machine productivity. Keep this guide handy for your next field maintenance session and stay ahead of costly downtime.